From Flour to Finish: The Complete Bread and Rolls Baking Guide for Home Bakers
There is something deeply satisfying about pulling a perfectly baked loaf of bread from the oven. The golden crust crackles as it cools. The aroma fills every corner of the kitchen. And when you slice into it, the soft, airy crumb tells you that every step of the process came together exactly as it should. For many home cooks, bread baking feels like a mystery wrapped in flour and yeast. But once you understand the fundamentals, it becomes one of the most rewarding skills in the kitchen. This bread and rolls baking guide will walk you through everything you need to know—from essential ingredients to shaping techniques, from fermentation science to storage tips. Whether you're holding a wooden spoon for the first time or you've baked a dozen loaves and want to refine your technique, the principles covered here will help you bake with confidence.
Why Bread Baking Matters More Than You Think
Bread is one of the oldest prepared foods in human history, and for good reason. It is simple, nourishing, and endlessly adaptable. But beyond its role as a staple food, bread baking teaches patience, observation, and craftsmanship. It connects you to traditions from every corner of the globe. In a world of instant everything, taking the time to mix, knead, proof, and bake a loaf is a small act of mindfulness. It also gives you control over what goes into your food. No preservatives, no unnecessary additives, just flour, water, salt, and yeast—or sourdough starter if you prefer. Understanding the fundamentals of bread baking is not just about following a recipe. It is about learning how ingredients interact, how time and temperature shape texture, and how small adjustments can lead to dramatically different results. This knowledge applies whether you are baking soft dinner rolls, crusty artisan loaves, or enriched sweet breads.
The Building Blocks: Essential Baking Ingredients
Every loaf begins with the same core ingredients. But the quality and type of each ingredient makes a significant difference.
Flour Selection and Its Role
Flour is the backbone of bread. The protein content in flour determines how much gluten can develop, which directly affects the structure and chewiness of your bread. Bread flour typically has a higher protein content than all-purpose flour, making it ideal for yeast-risen loaves. Whole wheat flour adds fiber and a nutty flavor but absorbs more water and produces a denser crumb. A flour selection guide helps you match the right flour to the type of bread you want to make. For artisan loaves, a blend of bread flour and whole wheat flour often strikes the perfect balance between structure and flavor. For soft rolls, all-purpose flour or a lower-protein flour yields a tender texture.
Water and Hydration Concepts
Water does more than hydrate the flour. It activates enzymes, dissolves salt and sugar, and controls the temperature of the dough. The ratio of water to flour, known as bread hydration, is one of the most important concepts in bread baking. Higher hydration doughs (70% water or more relative to flour) produce open, airy crumb structures and crispy crusts. Lower hydration doughs (55–65%) are easier to handle and produce denser, tighter crumbs suitable for sandwich bread or rolls. Understanding hydration allows you to adjust a recipe based on the flour you are using and the result you want. A wetter dough might feel tricky at first, but it rewards you with a loaf that has a light, irregular crumb and excellent keeping qualities.
Yeast, Salt, and Fat
Yeast is the engine of fermentation. It consumes sugars and produces carbon dioxide, which makes the dough rise. Active dry yeast, instant yeast, and fresh yeast all work, but they require different handling. Salt is not just for flavor. It strengthens the gluten network, controls yeast activity, and improves crust color. Fat—whether butter, oil, or shortening—tenderizes the crumb, adds richness, and extends shelf life. Enriched doughs like brioche or soft rolls rely on fat for their delicate texture.
Dough Mixing Techniques and Kneading Methods
Mixing and kneading are where the dough comes to life. Proper technique ensures even hydration, gluten development, and a smooth, elastic dough.
Mixing for Consistency
Start by combining flour and water (a process called autolyse) before adding yeast and salt. This allows the flour to fully hydrate and enzymes to begin breaking down starches. After 20 to 30 minutes, add the remaining ingredients and mix until the dough comes together. Whether you mix by hand or with a stand mixer, the goal is a uniform dough with no dry patches.
Kneading Methods Compared
Kneading develops the gluten network that traps gas and gives bread its structure. The classic method involves pushing the dough away from you with the heel of your hand, folding it back, and repeating. This takes about 8 to 10 minutes for most doughs. An alternative is the stretch and fold method, often used for high-hydration doughs. Instead of traditional kneading, you stretch the dough and fold it over itself several times during the first hour of fermentation. This builds strength without deflating the gas bubbles. Both methods work. The key is to recognize when the dough is ready: it should be smooth, elastic, and pass the windowpane test, where a small piece stretches thin enough to see light through without tearing.
Fermentation and Proofing: The Heart of Flavor
Fermentation is where the magic happens. Yeast and bacteria produce gases, acids, and aromatic compounds that give bread its flavor, texture, and keeping qualities. Fermentation and proofing are two distinct stages that are often confused. Bulk fermentation happens after mixing and before shaping. The dough rises as a single mass. This is when most flavor develops. Proofing, or final proof, happens after shaping and before baking. The shaped dough rises until it is ready for the oven. Temperature plays a huge role. A slow, cold fermentation in the refrigerator overnight produces deeper, more complex flavors. A warm, quick fermentation produces a milder taste. Learning to judge when dough is properly proofed is a skill that comes with practice. The dough should feel airy, hold a gentle indentation when poked, and have nearly doubled in size.
Shaping and Scoring Artisan Bread
Shaping gives bread its final form and creates surface tension that helps the loaf hold its shape during baking. For artisan loaves, you might shape a boule (round) or a batard (oval). For rolls, you divide the dough into equal portions and shape them into smooth rounds. Dough shaping and scoring go hand in hand. Scoring is the act of slashing the top of the dough just before baking. It serves two purposes. First, it controls where the bread expands during oven spring. Second, it creates an attractive pattern that becomes the bread's signature. A sharp lame or razor blade makes clean cuts. The angle and depth of the cut affect how the bread opens. A shallow cut produces a subtle crack, while a deep slash creates a dramatic ear.
Understanding Oven Spring
The final burst of expansion that happens in the first few minutes of baking is called oven spring. It occurs because the heat causes gases inside the dough to expand rapidly, and the yeast becomes extremely active before it dies. Steam is critical during this phase. Introducing steam into the oven—by spraying water, adding a pan of hot water, or using a Dutch oven—keeps the crust soft long enough for the bread to fully expand. Without steam, the crust sets too early and limits oven spring. A good oven spring results in a light, open crumb and a crisp crust. A weak oven spring often means the dough was over-proofed, under-steamed, or baked at too low a temperature.
Soft Roll Baking Techniques for Everyday Baking
Soft rolls are a different challenge than crusty artisan bread. The goal is tenderness, not chew. Achieving this requires a dough enriched with fat, milk, or eggs, and careful handling to avoid developing too much gluten. Soft roll baking techniques include using a tangzhong or water roux method, where a portion of the flour and liquid is cooked into a paste before being added to the dough. This technique increases moisture retention and produces rolls that stay soft for days. Shaping rolls into uniform portions ensures even baking. Brushing with butter or egg wash before and after baking adds shine and richness.
Bread Styles From Around the World
Bread is a global language, and different cultures have developed distinctive styles based on local ingredients and traditions. A crusty French baguette relies on a lean dough and long fermentation. Italian ciabatta uses high hydration for its signature open crumb. German pumpernickel is dense, dark, and made from rye. Indian naan and Middle Eastern pita are cooked at extremely high temperatures to create their characteristic pockets. Exploring bread styles from around the world expands your baking repertoire and deepens your understanding of how ingredients and techniques shape the final loaf. Each style teaches something new about flour, hydration, heat, and timing.
Bread Storage and Freshness
Once you have baked a beautiful loaf, you want it to stay fresh as long as possible. Bread storage and freshness depend on the type of bread and how it is wrapped. Crusty artisan bread should be stored at room temperature in a paper bag or wrapped in a cotton cloth. Plastic bags trap moisture and soften the crust. Enriched breads and soft rolls keep better in plastic or an airtight container. Bread can also be sliced and frozen for long-term storage. Thaw at room temperature or toast directly from frozen. Avoid refrigerating bread, as the cold temperature accelerates staling. If your bread does go stale, do not throw it away.
Creative Uses for Leftover Bread
Stale bread is a gift in disguise. It is the starting point for croutons, breadcrumbs, panzanella salad, strata, bread pudding, and French toast. Creative uses for leftover bread turn waste into something delicious. Cubed and toasted, stale bread becomes crunchy salad toppings. Ground into crumbs, it coats chicken or binds meatballs. Soaked in custard, it transforms into a comforting dessert. In many cuisines, leftover bread is considered essential for certain dishes. Learning to repurpose bread is both economical and creative. It also reduces food waste, which is a meaningful practice in any kitchen.
Professional Baking Tips and Troubleshooting
Even experienced bakers run into problems. Dough that does not rise, crust that is too dark, crumb that is dense or gummy. Professional baking tips and troubleshooting help you diagnose and fix these issues. If your dough is not rising, check the temperature of your water and the freshness of your yeast. If the crust is too dark, lower the oven temperature or tent the loaf with foil. A dense crumb often means the dough was under-proofed or the gluten was not developed enough. A gummy crumb can result from cutting the bread before it cools completely. Give your loaf at least an hour to cool on a wire rack. This allows the steam to escape and the crumb structure to set.
Baking Plans and Progress Tracking
One of the most practical tools for improving your bread baking is keeping a record. Baking plans and progress tracking allow you to note what worked, what did not, and what you want to try next. Record the flour type, hydration percentage, fermentation time, shaping method, baking temperature, and final result. Over time, these notes become a personalized guide that helps you replicate successes and learn from mistakes. A baking plan might include scheduling when to start the dough based on when you want fresh bread. Sourdough, for example, requires a longer timeline than yeasted bread. Planning ahead ensures that baking fits into your daily routine rather than disrupting it.
Bringing It All Together
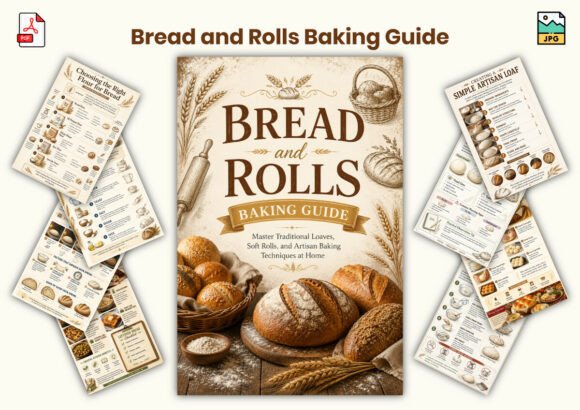
The Bread and Rolls Baking Guide is more than a collection of recipes. It is a framework for understanding the art and science of bread making. From flour selection and hydration concepts to shaping, scoring, and storage, every topic builds on the others. Once you grasp these fundamentals, you can adapt any recipe to your preferences, troubleshoot problems with confidence, and eventually create your own bread styles. Whether you are baking for your family, for gifts, or simply for the joy of it, the skills you develop in the kitchen will serve you for a lifetime. Bread baking is a journey, not a destination. Each loaf teaches you something new. And the best part is that you get to eat your progress along the way.
Ready to start your bread baking journey? Download the complete Bread and Rolls Baking Guide, a beautifully designed digital resource that walks you through every step with professional layouts and practical instruction.